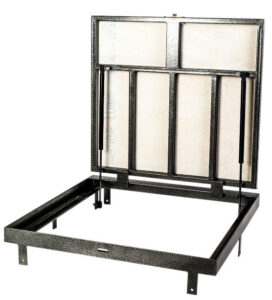
Floor hatch under tiles with gas shock absorbers, “Light” model
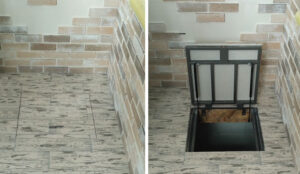
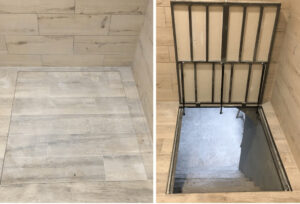
The hatch is intended for everyday use during interfloor movement and also for inspection. This model is made specifically for indoor use, with a lightweight lid and improved hatch design. After facing with ceramic tiles, you can walk on the hatch cover (withstands up to 500 kg), which in turn saves useful space. Another advantage of this model is that the floor hatch after facing against the background of the floor is invisible, for this reason it is called an invisible hatch .
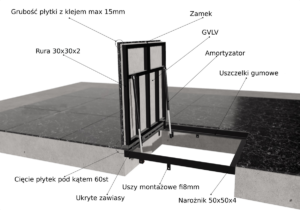
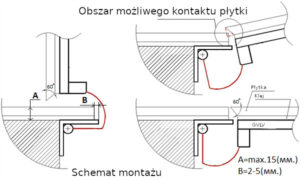
The hatch to the basement consists of two main parts, the hatch frame and its cover. The design of the product includes gas shock absorbers for opening the hatch cover , which are selected according to the length and pressure force according to the dimensions of the hatch. Also, our floor hatches for safe opening and avoiding rupture of the gas shock absorber are equipped with hinge stops that stop the lid from opening at the desired angle. Basement hatches are made from thick-walled rolled metal, which is connected through professional welding into a geometric structure of the required size (see technical specifications). All metal parts of the hatches are painted with anti-corrosion enamel , which increases the service life of the hatch in rooms with high humidity. A durable GVLV plate is screwed to the hatch cover , which after priming can be faced with ceramic tiles. To increase rigidity under load on the surface of the slab, the hatch cover is strengthened with spacers, in accordance with the size of the hatch and its purpose. The invisible floor hatch can be opened using a latch lock and a four-sided rotary key included in the hatch kit. Closing occurs by simply pressing the hatch cover towards the frame. For tight pressing and sealing, rubber seals are provided around the perimeter of the hatch frame. The lid is opened using special hinges that prevent chipping of the tiles at the tile joints along the contour of the hatch.
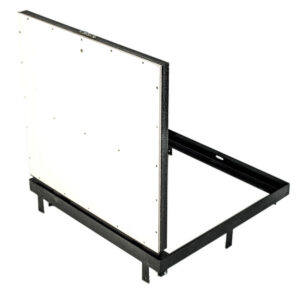
The cellar hatch is installed in a prepared opening of the appropriate hatch size (see installation). Floor hatches have welded “ears” in the frame design for fastening, through the holes of which the hatch is fixed in the opening using anchors or dowels.
Floor hatches for tiles with shock absorbers of the “Light” model are used both for interfloor movement and for access to inspections located in the floor. Our hatches are often searched for by their purpose: a basement hatch or a cellar hatch, a floor hatch for inspection or a floor hatch for tiles; a hatch for laminate flooring is also used. Today, a floor hatch with shock absorbers is the optimal solution for country houses, where it is important to preserve the usable area of the room, maintain the design of the room and gain easy access to the necessary rooms. Due to their design features, our floor hatches can withstand heavy surface loads. Also, floor hatches with shock absorbers are often used in non-residential premises, such as a garage, warehouse or workshop.