How to install a pressure hatch?

Hatches under tiles  are used where it is necessary to disguise the equipment of communications located in the room. This is done both for aesthetic reasons and in order to protect communications from damage. The presence of a hatch provides access to pipes, wires, etc. hidden under the floor, in the walls and on the ceiling. Such inspection hatches under the tiles are distinguished by the fact that they are invisible, since they are lined in the same way as the surrounding areas.

Installing a hatch under the tiles

Before installing a hidden hatch, you need to know its structure. The material for the frame mechanism is tubular steel. 

A cover is included with the hidden hatch frame. Its base consists of the same metal as the frame mechanism. To finish the outer covering of the lid, moisture-resistant gypsum fiber GVLV is used. It is these materials that the tile finish is applied to.

The version with a sliding sunroof differs in that it is equipped not with a standard, but with a three-link hinge design. Thanks to this solution, the lid opens not only frontally, but also laterally. The hinges are capable of adjusting several positions of the lid. The structure is painted with powder enamel, which will provide anti-corrosion protection. The hatch is equipped with reliable fittings.

When choosing the size of a hidden hatch for tiles, it is better to be guided by the dimensions of the finishing material. For example, with a tile size of 60×30 cm, the same hatch parameters are best suited. The dimensions are determined by the size of the frame; the dimensions of the tiled door should be slightly inferior to it. This is necessary for a perfect match between the tiles and the joints, which ensures an aesthetically pleasing appearance of the hatch after installation.

After choosing the dimensions, you should think about a solid foundation for the structure. Typically, a plasterboard box is installed on the edges of a metal frame. However, it is advisable to use a brick or block opening as a stronger base. With this installation method, fastening is carried out using dowels. When connected, the frame and masonry form gaps that are well filled with polyurethane foam. It is important to make the base strong enough so that it does not wobble under any circumstances.

The frame is fastened with long self-tapping screws. The holes for them are drilled in the metal in advance. The profile planes for the frame and the plasterboard box must coincide. Then the structure should be sheathed with overlapping plasterboard material.

Then comes priming and tiling. When covering pressure hatches with tiles , you should block the pressure mechanism using wedges so that the lid does not open during finishing.

For the full effect of invisibility, it is recommended to silicone the seams along the edge of the door and cut through the silicone at an angle of 45 degrees

Installation instructions for the "Push" model hatch:

Step 1
Prepare an opening for installing the hatch. The size of the opening must correspond to the size of the hatch (see table of standard sizes) 
step_1
Step 2
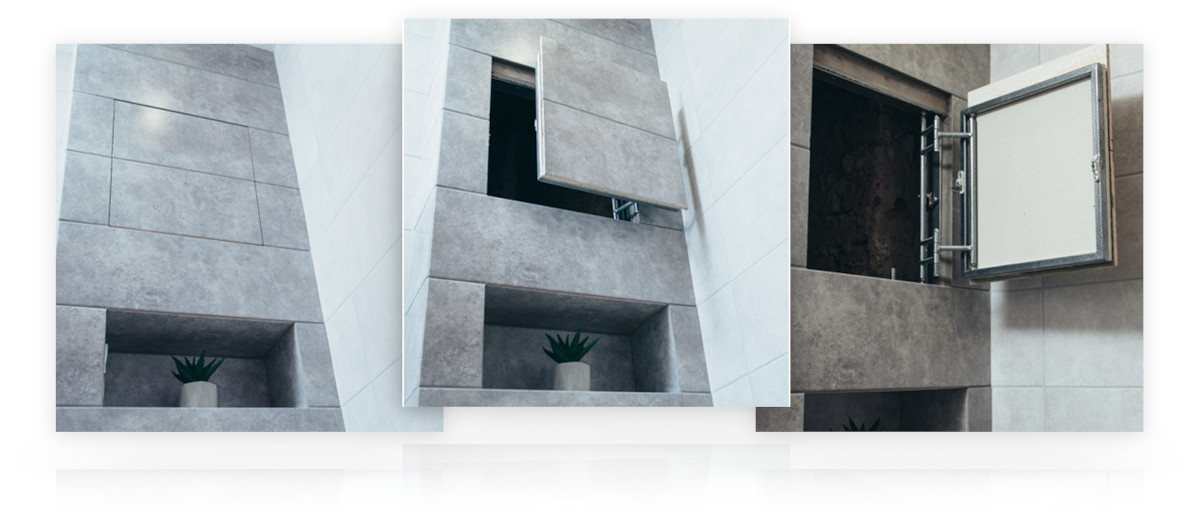
Install the hatch in the opening and align the hatch door plate in the same plane with the main wall.
step_2
Step 3
Secure the hatch frame in the opening using self-tapping screws or dowels.
step_3
Step 4
Prime the hatch door slab and glue the tiles or mosaics. The tile protrusion beyond the door is allowed from 5 to 75 mm. with the condition that 60% of the tiles are glued to the door plate.
step_4
Step 5
After the glue has dried, rub the tile seams, except for the seam along the contour of the door.

Sound insulation and seam sealing.

Step 1
Thoroughly clean the joints along the contour of the tile.
Step 2
Cover the outline of the door with masking tape, leaving a gap in the seams.
Step 3
Fill the tile seams along the door contour with silicone sealant.
Be careful to fill the seams along the contour of the hatch door for push-type models only to the thickness of the ceramic tiles. To activate the push locks and open the door - do not allow sealant to get under the tiles!
step_5
Step 4
Use a rubber spatula to smooth out excess sealant.
Step 5
Before the sealant dries, remove the masking tape.
Step 6
After the silicone sealant has dried, use a knife-blade to cut the seam at an angle of 45 degrees to the entire depth of the sealant.
step_6
Step 7
To open the hatch door, it may be necessary to remove excess silicone sealant from the tiles glued to the wall (but not from the tiles on the door!)
step_7

Table of sizes and main parameters of standard push hatches:

Hatch dimensions (frame) (WxH mm.) Door dimensions (WxH mm.) Door load (kg) Complete hatch weight (kg)
200x300 152x245 9 2.1
200x400 152x345 11 2.3
200x500 152x445 12 2.7
300x200 252x145 9 2.1
300x300 252x245 13 2.5
300x400 252x345 14 3.2
300x500 252x445 16 3.9
300x600 252x545 18 4.6
400x300 352x245 14 3.2
400x400 352x345 16 3.6
400x500 352x445 18 4.3
400x600 352x545 20 5.0
400x900 352x845 27 10.0
500x300 452x245 16 3.9
500x400 452x345 18 4.3
500x500 452x445 20 6.5
500x600 452x545 23 7.7
500x800 452x745 27 10.0
600x300 552x245 18 4.6
600x400 552x345 20 5.0
600x500 562x445 24 8.8
600x600 552x545 30 12.7
600x1000 552x945 32 14.0
Shopping Cart
Scroll to Top